First things first, what exactly is a media kit and why do you need one?
A media kit is a document that outlines the main facts and statistics about your blog. It is a key tool used when working with brands. The kit is presented to brands that you are interested in collaborating with, allowing them to see all the information about your blog, at a glance.

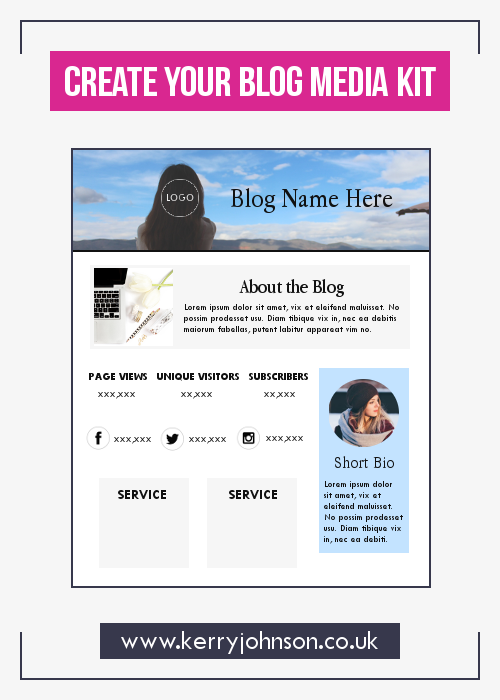
Your media kit will typically include social media statistics, topics you write about and pricing for collaboration options and services. There is no definitive list of what you should include in your kit, but below is an outline of some key features. Remember, this is your opportunity to show a brand why they should work with you.
What Should You Include?
Always start off with a branded header. This is one of the most important visual elements of your blog and will help to establish your identity. Include your logo, if you have one, and a brief introduction as to what you blog about and your mission statement.
Once you’ve introduced your blog, it’s time to show the person behind it. Add a professional head shot and a brief bio, so potential collaborators can get to know who you are.
Anyone who is interested in working with you will want to see your blog statistics. You should include your monthly views and unique visitors, reader demographics and RSS and/or email list subscribers. Along with your blog statistics, you should also present your social following. If you are able to, and you feel that it will benefit you, include growth statistics for each platform. This information will help a brand to decide whether a collaboration will be mutually beneficial.
The next key piece of information is the services you provide and your sponsorship policies. You should be clear and upfront about details including advertising packages and pricing.
To help your potential collaborators to make their decision, you can include examples of your previous work and partnerships, as well as supporting testimonials. You can mention companies you have previously worked with and any campaigns you have been featured in.
Finally – and this one is crucial – you should include your contact information. Try to make it as easy as possible for people to reach you, so that they don’t need to go out of their way to find out how.
Putting Your Kit Together
Your media kit should be three things: branded, visually appealing and accessible, meaning that it is clear and easy to understand. There is no correct order for the information you choose to share, but you should be strategic in the way that you present it. (For example, there is no point in jumping into pricing information before you have even introduced your blog.)
Your media kit can be single or multi-page, and you don’t need to be design-savvy to create one. If you are familiar with design software, you can use it to create a more complex design but, if not, you can opt for a much more simple method. It’s possible to create a styled document in MS Word and save it as a PDF file.
It is always best to save your media kit as a PDF file, as this is readable on most devices and is easy to download or attach to an email. If you have no idea where to start with designing your kit, you can get a template from websites such as Etsy.
Using Your Media Kit
Some people make their media kits readily available on their website, although you do not need to do this if you’d prefer that only certain people see it. If you’d like to make it readily available, you could include it with information on advertising or sponsorship.
It is also a great tool to use when responding to PR emails. You can use it to show brands, at a glance, how you can work together. This is the perfect starting point for information exchange and planning a collaboration.

